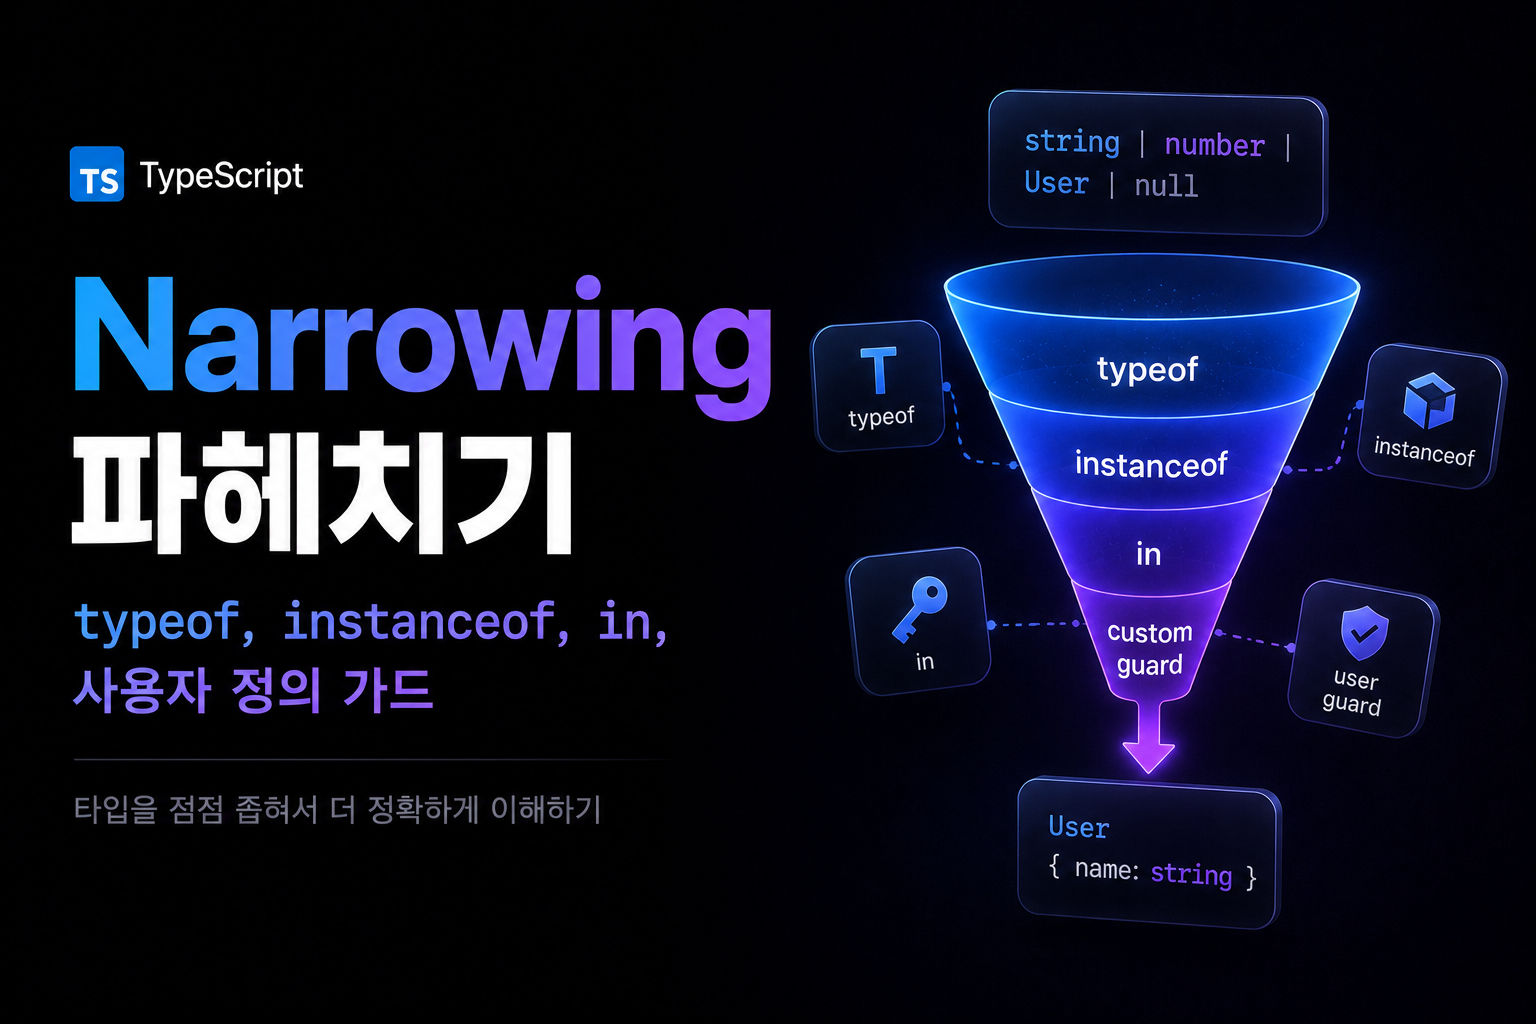
하지만 실제 코드에서는 "이 값이 string일 수도 있고, number일 수도 있다"는 상황이 자주 생긴다. 이럴 때 TypeScript는 조건문 안에서 타입을 점점 좁혀나간다.
이것을 Narrowing이라고 한다.
Narrowing은 TypeScript가 런타임 조건 검사를 바탕으로 타입을 더 구체적으로 추론하는 과정이다. 이 메커니즘을 깊이 이해할수록 타입 단언(as)을 쓰지 않아도 안전하게 코드를 작성할 수 있다.
제어 흐름 분석 (Control Flow Analysis)
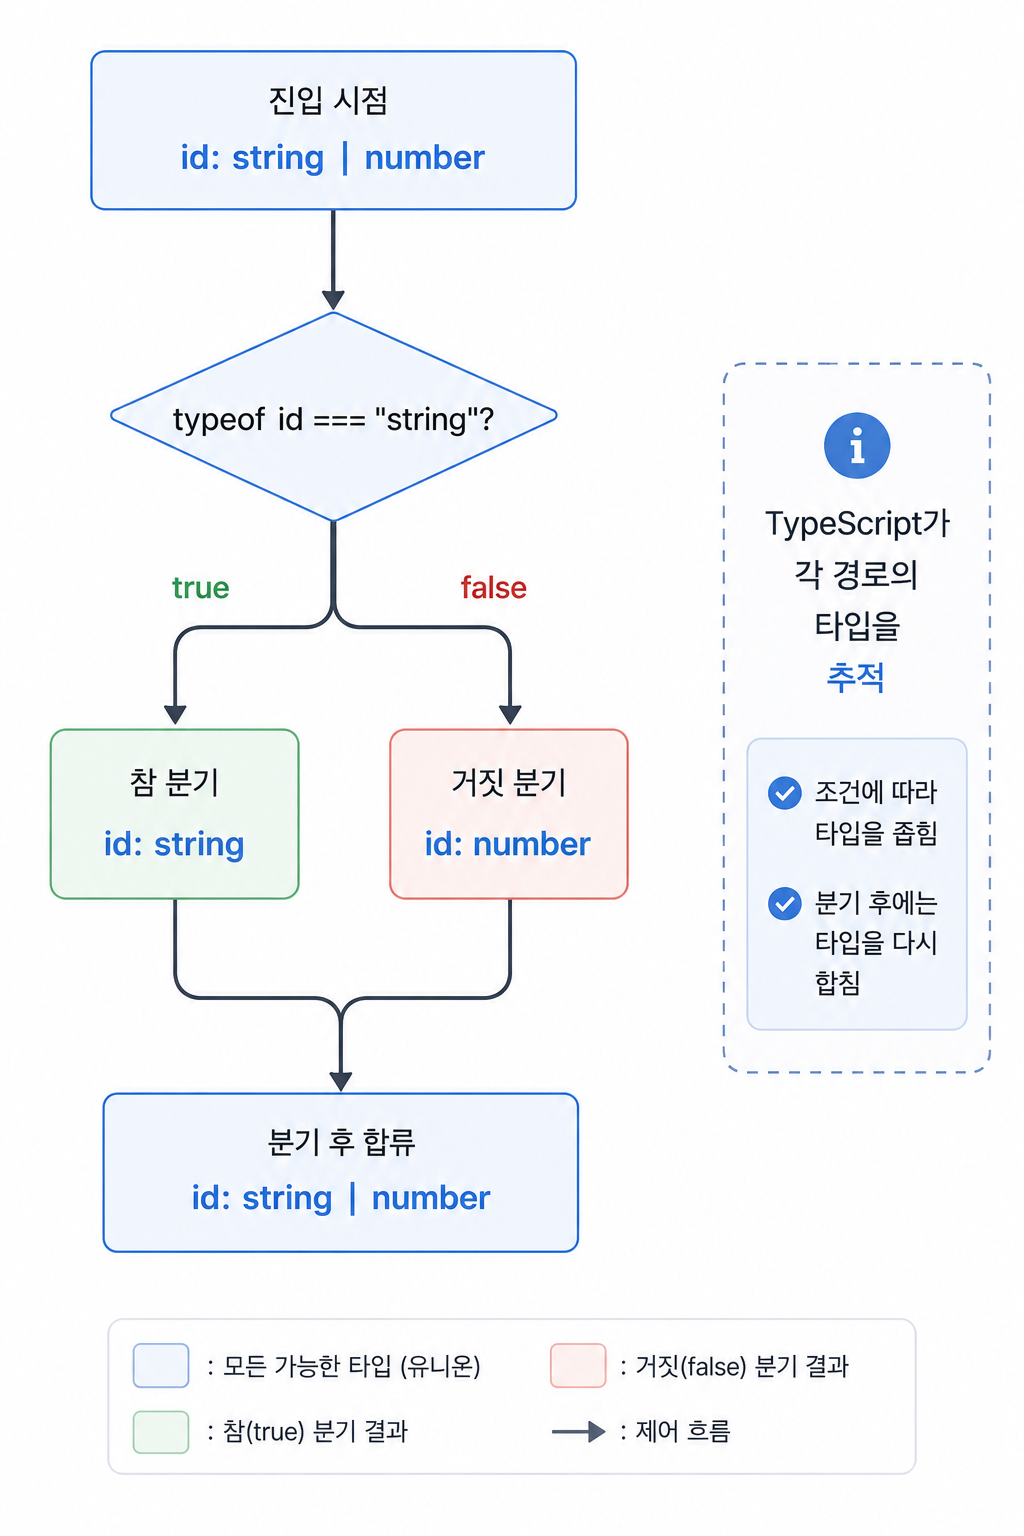
TypeScript는 코드의 실행 흐름을 따라가며 각 지점에서 가능한 타입을 추론한다.
function printId(id: string | number) { // 여기서 id: string | number if (typeof id === "string") { // 여기서 id: string console.log(id.toUpperCase()); } else { // 여기서 id: number console.log(id.toFixed(2)); }}
if 블록 안에서 TypeScript는 typeof id === "string" 조건이 참이라는 것을 알기 때문에 id를 string으로 좁힌다. else 블록에서는 나머지인 number로 좁힌다.
이것이 제어 흐름 분석이다. TypeScript 컴파일러는 각 코드 경로에서 어떤 타입이 가능한지 추적한다.
typeof 가드
원시 타입(string, number, boolean, bigint, symbol, undefined, function)을 구분할 때 쓴다.
function format(value: string | number | boolean) { if (typeof value === "string") { return `"${value}"`; } if (typeof value === "number") { return value.toLocaleString(); } return String(value);}
typeof의 한계: null도 "object"를 반환한다.
typeof null === "object" // true
그래서 null 체크는 별도로 해야 한다.
function processValue(value: string | null) { if (typeof value === "string") { // 여기서 value: string (null은 제외됨) return value.toUpperCase(); }}
typeof가 잡을 수 있는 타입
typeof x === "string" // stringtypeof x === "number" // numbertypeof x === "boolean" // booleantypeof x === "bigint" // biginttypeof x === "symbol" // symboltypeof x === "undefined" // undefinedtypeof x === "function" // Function (객체 중 함수만)typeof x === "object" // object, null, 배열, 클래스 인스턴스 등
"object"는 너무 넓다. 클래스 인스턴스, 배열, 일반 객체, 심지어 null까지 포함된다. 그래서 구체적인 객체 타입을 좁힐 때는 다른 방법이 필요하다.
instanceof 가드
클래스 인스턴스를 구분할 때 쓴다.
class Dog { bark() { return "woof"; }}class Cat { meow() { return "meow"; }}function makeSound(animal: Dog | Cat) { if (animal instanceof Dog) { // 여기서 animal: Dog return animal.bark(); } // 여기서 animal: Cat return animal.meow();}
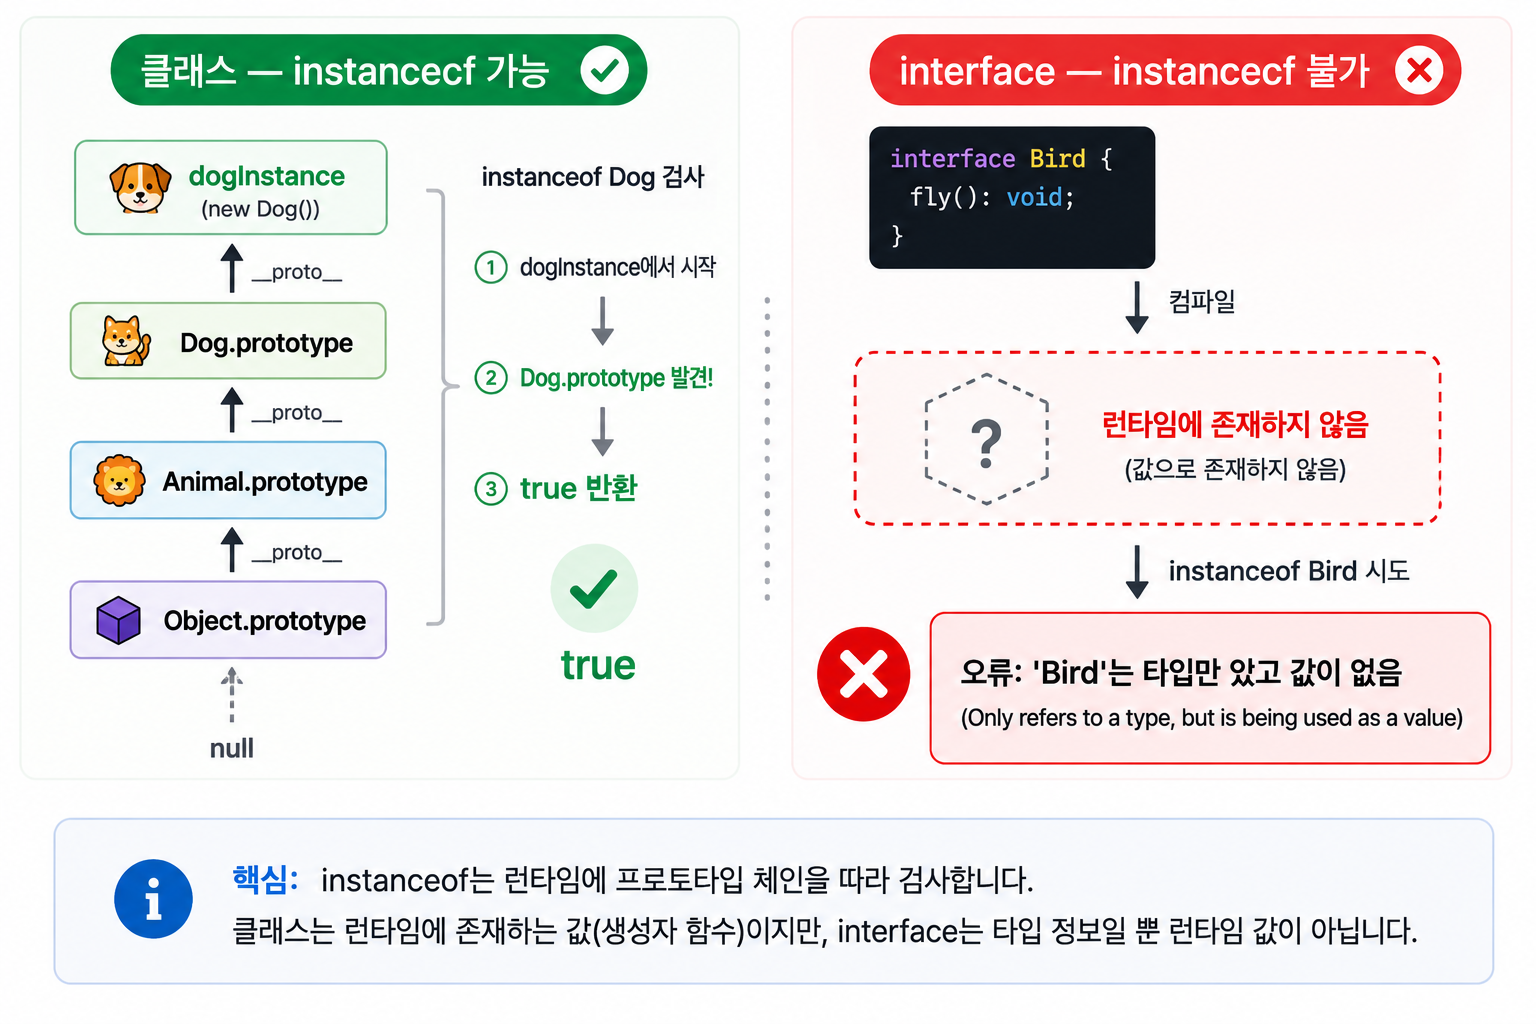
instanceof는 프로토타입 체인을 검사한다. 클래스 계층이 있을 때도 올바르게 동작한다.
instanceof는 클래스에만 동작한다. 순수한 객체 타입(interface, type alias)에는 쓸 수 없다.
interface Dog { bark(): string;}function test(animal: Dog) { if (animal instanceof Dog) { // 오류: 'Dog'는 타입만 있고, 값이 없다 }}
런타임에 클래스가 존재해야 instanceof를 쓸 수 있다. interface는 컴파일 후 사라지기 때문에 런타임에 없다.
in 연산자 가드
객체에 특정 프로퍼티가 존재하는지 확인한다. interface, type alias로 정의한 타입도 좁힐 수 있다.
interface Bird { fly(): void; feathers: number;}interface Fish { swim(): void; scales: number;}function move(animal: Bird | Fish) { if ("fly" in animal) { // 여기서 animal: Bird animal.fly(); } else { // 여기서 animal: Fish animal.swim(); }}
in 연산자는 런타임에서 프로퍼티 존재 여부를 체크하기 때문에 interface에도 사용할 수 있다.
in 가드 주의사항
두 타입에 같은 프로퍼티가 있으면 좁혀지지 않는다.
interface Cat { name: string; meow(): void;}interface Dog { name: string; bark(): void;}function identify(animal: Cat | Dog) { if ("name" in animal) { // 여기서 animal: Cat | Dog — 둘 다 name이 있으므로 좁혀지지 않음 }}
좁히려면 한 타입에만 있는 고유한 프로퍼티를 사용해야 한다.
동등 비교 가드 (Equality Narrowing)
===, !==, ==, !=을 이용한 좁힘이다.
function process(value: string | null | undefined) { if (value === null) { // 여기서 value: null } else if (value === undefined) { // 여기서 value: undefined } else { // 여기서 value: string value.toUpperCase(); }}
== (느슨한 비교)은 null과 undefined를 동시에 좁힌다.
function process(value: string | null | undefined) { if (value == null) { // 여기서 value: null | undefined (둘 다) } else { // 여기서 value: string }}
null과 undefined를 같이 처리하고 싶을 때 == null 하나로 처리할 수 있다.
진실성 가드 (Truthiness Narrowing)
falsy 값을 걸러내는 조건으로 좁힌다.
function printLength(str: string | null | undefined) { if (str) { // 여기서 str: string (null, undefined는 falsy이므로 제거) console.log(str.length); }}
주의: 빈 문자열 "", 0, NaN도 falsy다.
function process(value: string | number) { if (value) { // 여기서 value: string | number // 하지만 "" 와 0은 여기 들어오지 않는다 — 의도치 않은 결과 }}
진실성 가드는 null/undefined 제거에 적합하다. 의미 있는 빈 값("", 0)이 섞이면 == null이나 명시적 비교가 더 안전하다.
할당 가드 (Assignment Narrowing)
값을 할당하는 순간 타입이 좁혀진다.
let x: string | number;x = "hello";// 여기서 x: stringx = 42;// 여기서 x: number
선언 시 유니온으로 정의했어도, 실제 할당된 값에 따라 타입이 좁혀진다.
사용자 정의 타입 가드 (User-Defined Type Guards)
typeof, instanceof, in으로 처리할 수 없는 복잡한 런타임 검증에 사용한다.
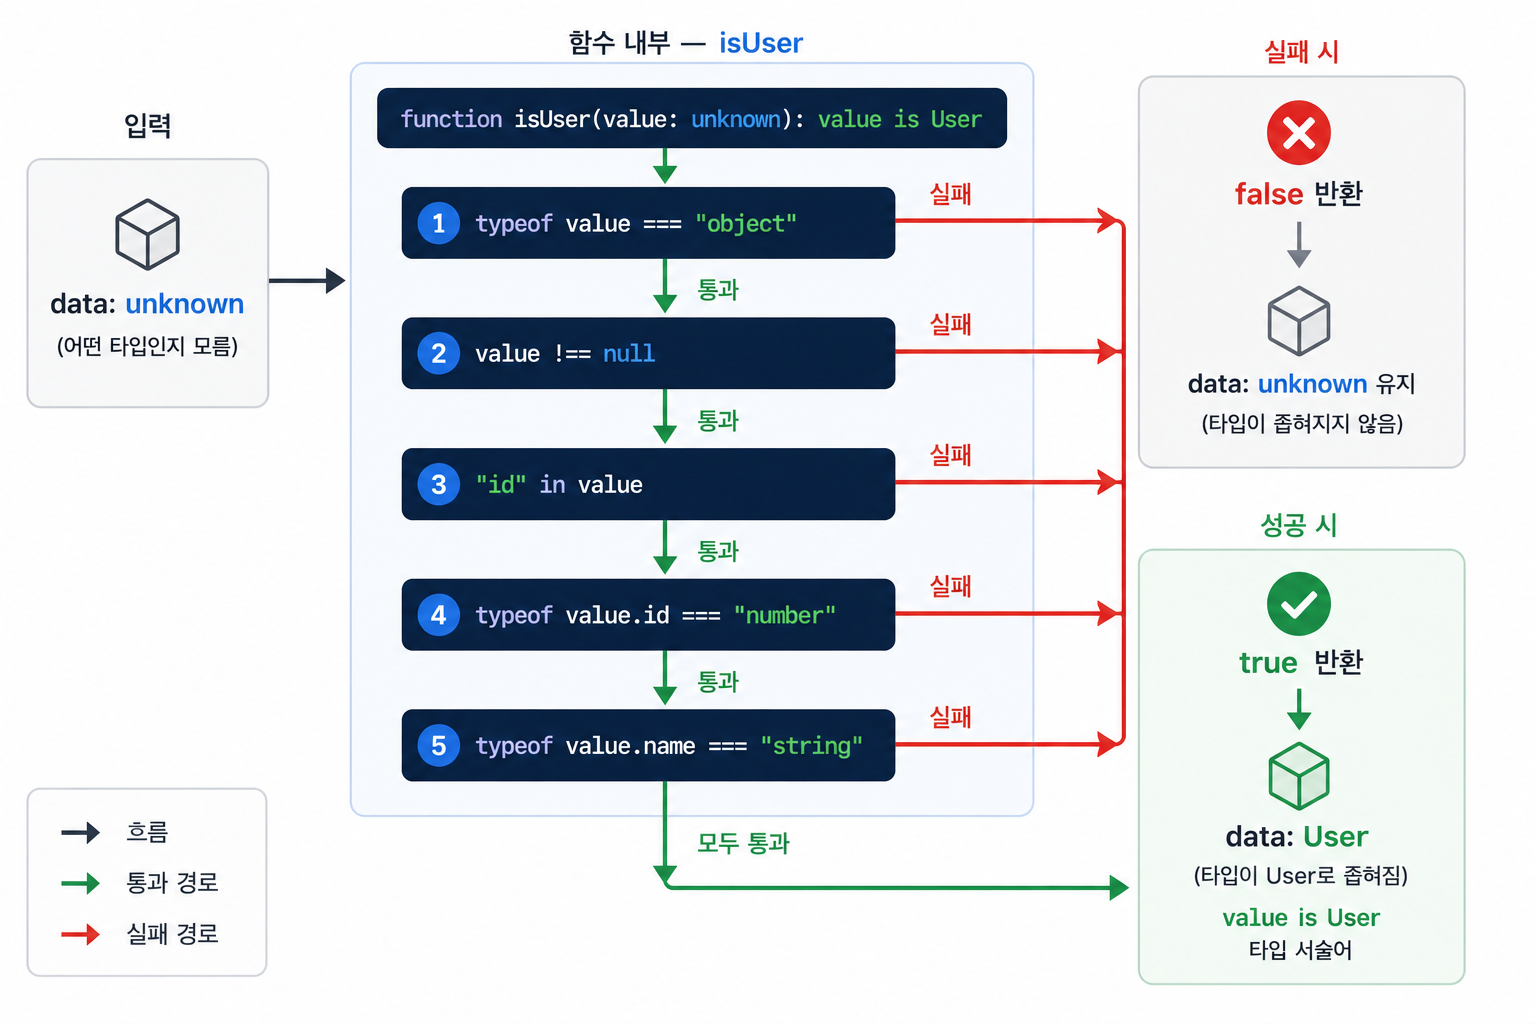
반환 타입에 value is Type 형식의 **타입 서술어(Type Predicate)**를 쓴다.
interface User { id: number; name: string; email: string;}function isUser(value: unknown): value is User { return ( typeof value === "object" && value !== null && "id" in value && "name" in value && "email" in value && typeof (value as any).id === "number" && typeof (value as any).name === "string" && typeof (value as any).email === "string" );}const data: unknown = await fetchUser();if (isUser(data)) { // 여기서 data: User console.log(data.name);}
isUser 함수가 true를 반환하면 TypeScript는 해당 블록에서 value를 User로 취급한다.
타입 가드 vs 타입 단언
// 타입 단언 (as) — 위험const user = data as User; // TypeScript를 강제로 납득시키는 것// 타입 가드 — 안전if (isUser(data)) { // TypeScript가 런타임 조건을 기반으로 추론하는 것}
as는 런타임 검증 없이 컴파일러를 설득하는 것이다. 실제 값이 다르면 런타임에서 터진다.
타입 가드는 런타임에 실제 확인 후 타입을 좁힌다. 훨씬 안전하다.
타입 가드 함수 설계 원칙
1. 검증을 철저하게
// 나쁜 예 — 검증이 부실하다function isUser(value: unknown): value is User { return typeof value === "object" && value !== null;}// 좋은 예 — 모든 필드를 검증한다function isUser(value: unknown): value is User { if (typeof value !== "object" || value === null) return false; const obj = value as Record<string, unknown>; return ( typeof obj.id === "number" && typeof obj.name === "string" && typeof obj.email === "string" );}
2. Zod, valibot 등 스키마 라이브러리 활용
import { z } from "zod";const UserSchema = z.object({ id: z.number(), name: z.string(), email: z.string().email(),});type User = z.infer<typeof UserSchema>;function parseUser(data: unknown): User { return UserSchema.parse(data); // 실패 시 throws}
복잡한 타입 가드를 직접 작성하는 것보다 스키마 라이브러리를 쓰면 검증 코드와 타입 정의가 동기화된다.